
How To Install A Flagstone Garden Walkway- Garden path In 8 Simple Steps
Are you inspired to create stone walkway or garden path? If so, you are in the right place. Discover our step-by-step guide to installing a flagstone path walkway. There is eight simple steps to installing a garden path. Learn how to plan, prepare and install a flagstone garden walkway in no time.
I am sharing photos of two stone paths I designed. One in my backyard and one next to our house which incorporated a patio. Creating your own DIY stone walkway is rewarding and fun (not to mention the workout). It’s an ideal way to turn an area in your yard into a outdoor oasis that you will enjoy.
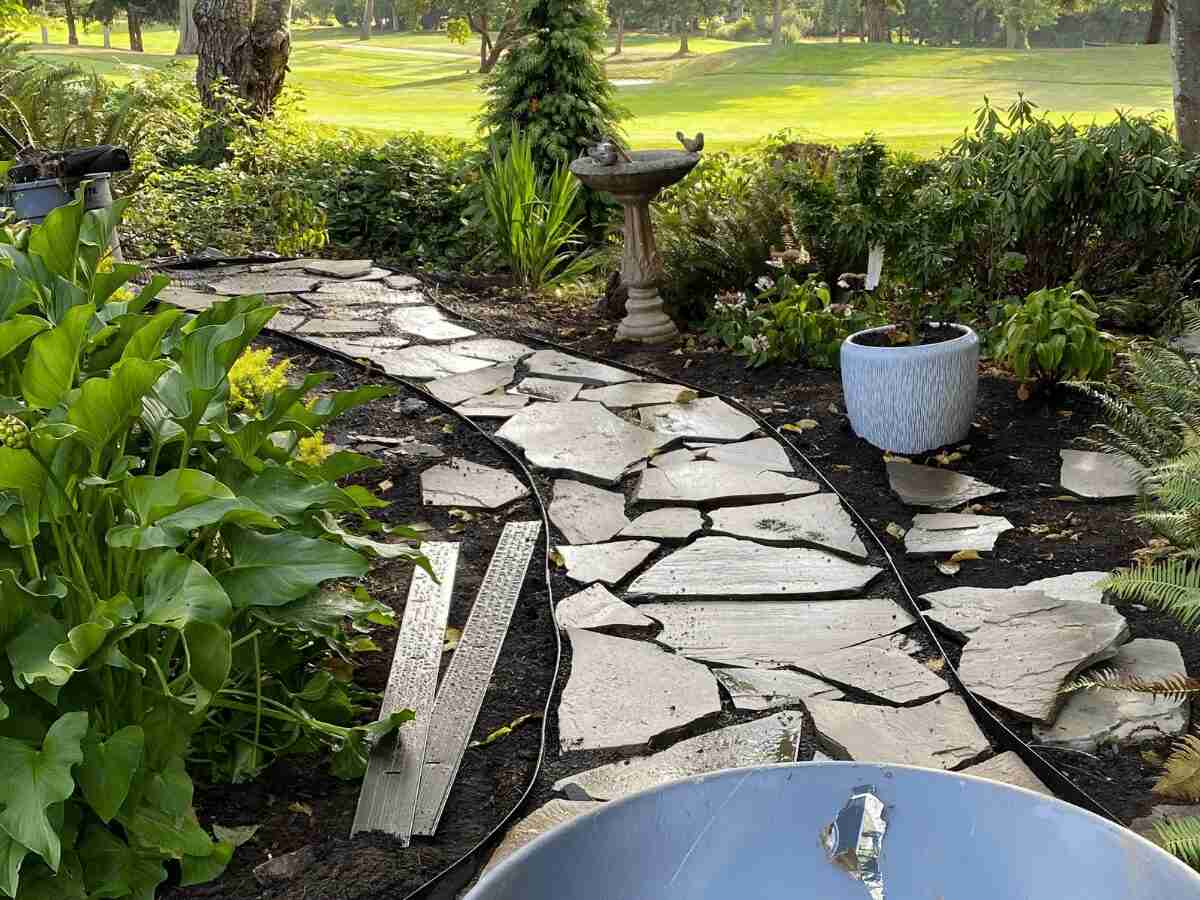
Early on, I envisioned a curved garden path that would add a romantic mystery and a sense of purpose to my sweet teak garden bench. I have always appreciated a pretty flagstone pathways that takes you on a short journey through sunny shrubs and stunning perennials in the comfortable shade. My path was not designed for high foot traffic.
A winding or straight garden path made of natural stone offers a warm welcome to visitors in a garden or to the front door. There are so many garden pathway designs to explore.
Flagstone pavers installed in a random attractive pattern adds a fun texture to your outdoor oasis. When you mix larger stones with smaller ones offers lots of interest in a informal design type of way. For my garden path, I wanted the flagstone walkway to have a rustic look and feel. There are many ways to update your landscape with a garden path.

Add Interest and Romance To Your Garden With A Stepping Stone Path
Planning and Preparation To Install A DIY Stone Garden Path
Designing Your Flagstone Walkway
Designing your flagstone walkway is an essential step in creating a beautiful and functional outdoor space. Check out this post for 18 inspiring design ideas to explore.
Before you begin, consider the style and theme of your garden or yard. Think about the color and texture of the flagstone pavers, as well as the pattern and design of the walkway. You can choose from a variety of patterns, such as a straight path, a curved path, or a winding path.
To create a rough layout of your walkway, use a garden hose or a rope to mark out the desired shape and path. This will give you a sense of the space and help you visualize the final result. You can also use a piece of graph paper to sketch out a more detailed design.
When designing your flagstone walkway, consider the following factors:
- The width of the walkway: A good rule of thumb is to make the walkway at least 3 feet wide to accommodate two people walking side by side.
- The length of the walkway: Consider the distance between the starting and ending points of the walkway.
- The pattern and design: Choose a pattern that complements the style of your garden or yard.
- The color and texture of the flagstone pavers: Select pavers that match the color and texture of your outdoor space.
By taking the time to plan and design your flagstone walkway, you can create a beautiful and functional outdoor space that enhances the beauty of your garden or yard.

Safety Considerations
When building a flagstone path, you need to watch out for several safety issues. For instance, make sure the flagstones are level and stable. To do this, place each stone on the sand base and use a level to check for evenness. Tap gently with a rubber mallet and adjust the sand or gravel underneath until each stone sits securely and level.
The stones’ natural irregularities can create uneven surfaces that are a tripping hazard—especially for kids and the elderly—and make it tricky to place furniture. When wet, some flagstones become dangerously slippery, particularly around pool areas or in rainy climates. Loose stones, especially on slopes, increase accident risks, while loose filler like gravel can cause missteps.
Additionally, cracks, weed growth, and frost heave can all compromise the path’s integrity over time.
What To Consider When Installing A Flagstone Path
The path I designed is a curved circular flagstone path from one side of the garden to the other. The garden bench is a stop along the way in full sun. Whether your garden is large or small, installing a path that curves can make the garden more interesting and prominent.
If you want to add interest and romance to your garden, adding a path can do just that! I wanted to use flagstone because it was more formal and matched our patio’s curved stone wall. To achieve this, I decided to lay flagstone in a stepping stone style, ensuring proper spacing for ease of walking on the pathway.
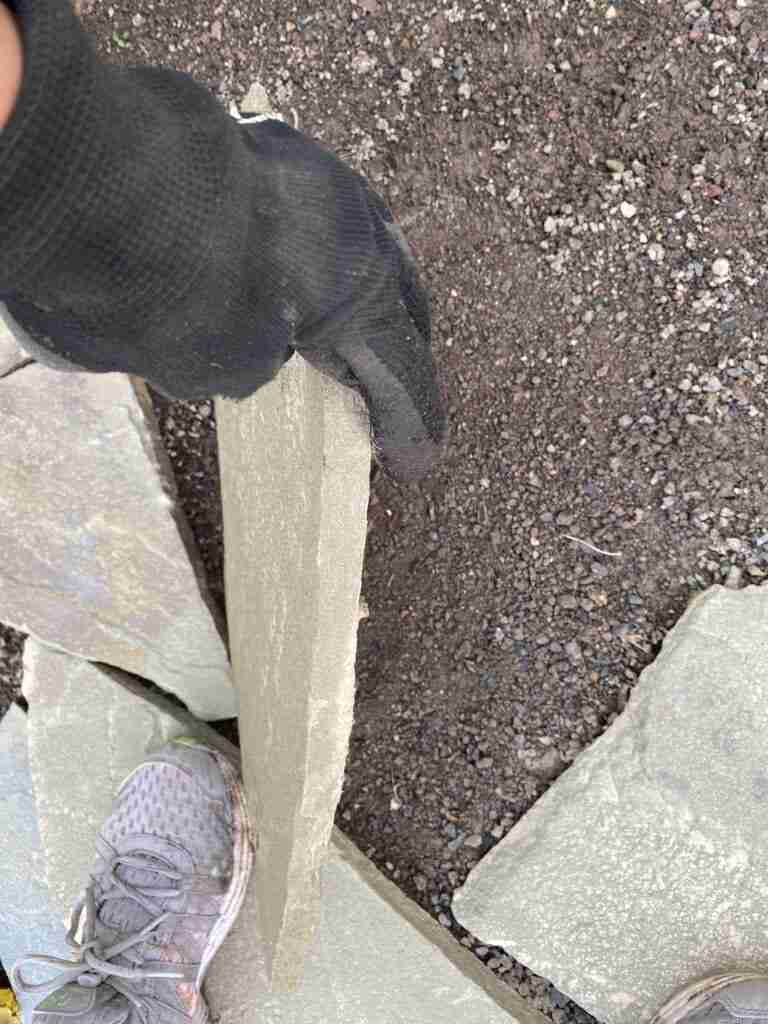
Choosing the type of stone
Choosing the type of stone for a walkway is simply a matter of taste. Just make sure the stone is thick enough so it won’t crack. To get the best price for flagstone, find locally available stone at garden centers or landscape suppliers. Stone is priced by weight, so choose pieces that are not too thick, it’s not necessary.

Flagstone Path Ideas
If you want to add interest and romance to your garden, adding a stepping stone path can do just that! I decided to use flagstone because it was more formal and matched our patio’s curved stone wall as opposed to using concrete slab or concrete pavers. When considering a path design consider the surrounding landscape design and layout.
Choosing the type of stone for a walkway is simply a matter of taste. Just make sure the stone is thick enough so it won’t crack. To get the best price for flagstone, find locally available stone a garden centers or landscape suppliers. Stone is priced by weight, so choose pieces that are not too thick, it’s not necessary.
The Equipment You Need To Build The Path
Building a flagstone walkway requires the right equipment to ensure a safe and successful installation. Here are some of the essential tools and equipment you’ll need:
- A rubber mallet: This is used to tap the flagstone pavers into place and ensure they are level.
- A plate compactor: This is used to compact the crushed stone base and prevent settling.
- A garden hose: This is used to mark out the desired shape and path of the walkway.
- A straight edge or level: This is used to ensure the flagstone pavers are level and plumb.
- Safety goggles and gloves: These are essential for protecting yourself from flying debris and sharp edges.
- A wheelbarrow or bucket: This is used to transport the crushed stone and sand.
- A rake: This is used to spread the crushed stone and sand evenly.
- Stakes and string or 2 garden hoses
- Flat spade
- Wheelbarrow
- Hand tamp
Materials Needed to Install A Flagstone Pathway:
• Edging material (optional) metal or vinyl garden border
• Landscape fabric (weed barrier) and staples
• Quarter Minus gravel and a bed of sand or consider using crushed oyster shell because it contains oyster flour and compacts well.
• Large, flat stones
• Gravel, potting mix, plants (optional)
By having the right equipment on hand, you can ensure a safe and successful installation of your flagstone walkway.
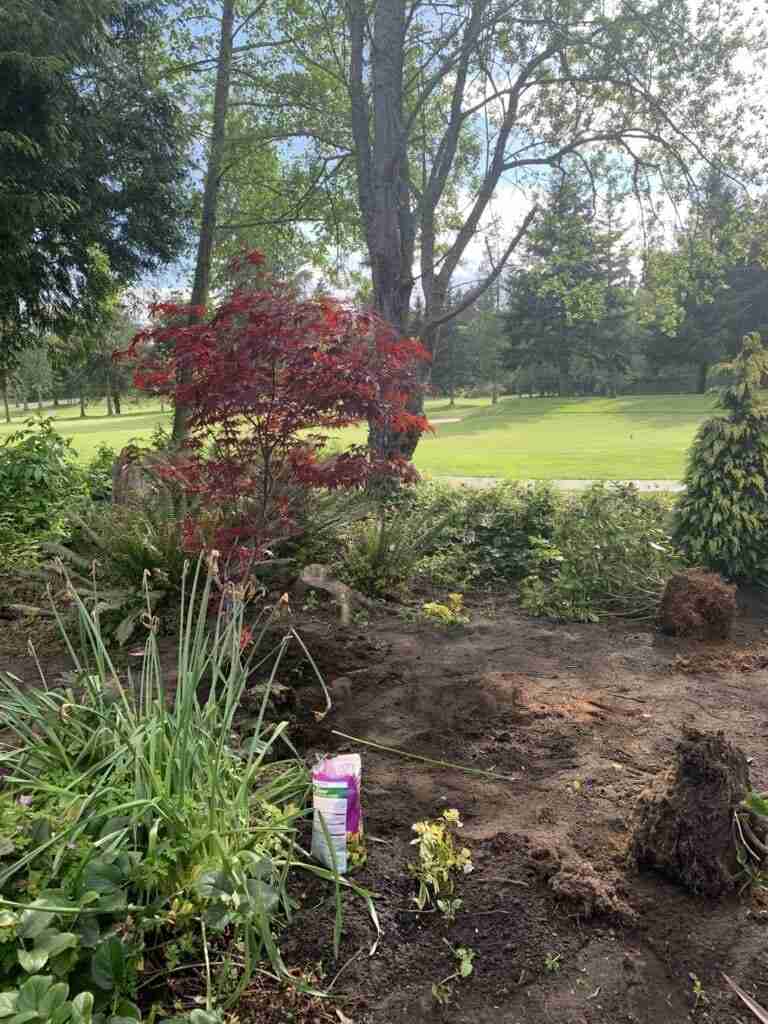
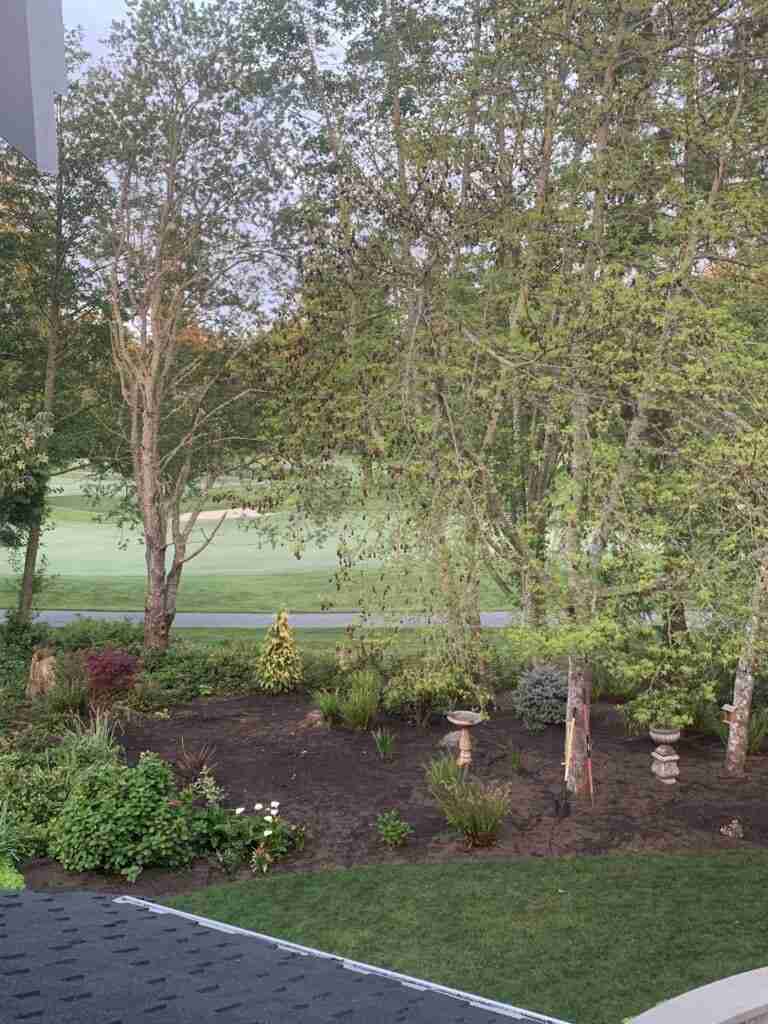
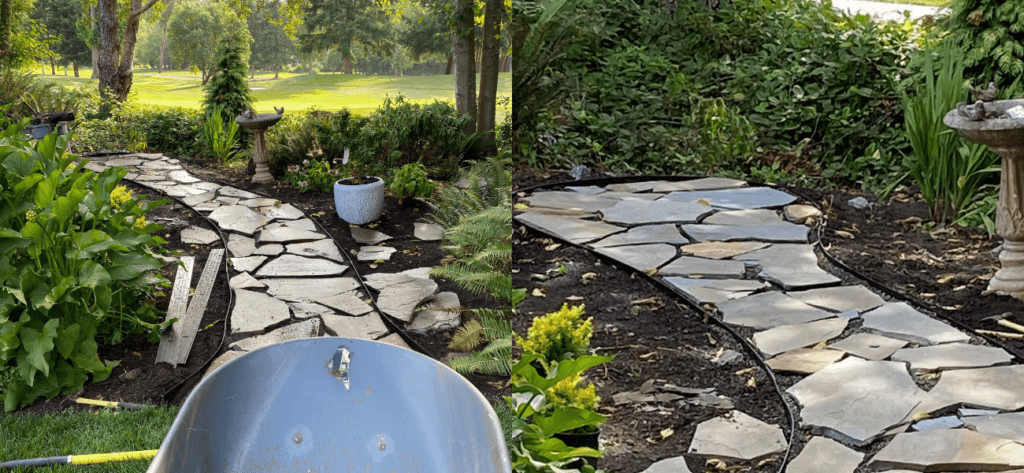
This what the garden looked like before the path above.
8 Simple Steps To Lay A Flagstone Path or Walkway
I am sharing how I installed a flagstone stepping stone path in eight simple steps. It is not as difficult as it looks, I promise!
1. Lay Out The Design Of The Path
How do I plan and layout my flagstone path? Begin by marking the area with stakes and string. Measure the path’s width and determine your design or pattern. Consider any curves or angles to create a natural look. I used string and rocks to play with the curve of the walkway. You may also use a garden hose. Depending on how long your path is, you can use stakes and tie string to each stake.
Since we were designing a rustic garden path, the path didn’t have to be too wide. If you are designing a high traffic area path, you will need enough room for two people to pass each other along the path. Make your own diy flagstone walkway with your own layout design

2. Excavate The Path
My son used a shovel and spade to cut the excavated area for the path. If you are laying the way grass is planted, you will want to use a sod cutter to remove grass and vegetation.
Jake and I removed weeds and cut through roots to achieve a depth of 4-5 inches. It doesn’t have to be perfectly flat because you can use the quarter minus 5 inches (coarse sand or pea stone works).
It doesn’t have to be perfectly flat because you can use the crushed rock and then masonry sand to level out the ground and make it as smooth as possible. A plate hand tamper is the ideal tool to create a smooth flat surface. Make sure you watch for any irrigation lines when you are cutting through the vegetation.
3. Install Edging (optional)
The next step is to install edging along the path. This is not necessary, but we wanted to keep the walkway tidy. The outside edge will hold the bed or mortar and natural stones providing an ideal walkway base.
I used the following edging material on Amazon. The galvanized metal was stiff enough to bend but firm enough to keep the gravel filler in place.The metal edging is installed with stakes. A hammer or sledge hammer works well to drive the stakes into the ground.
BUY HERE ON ON AMAZON- This is the edging material I used.
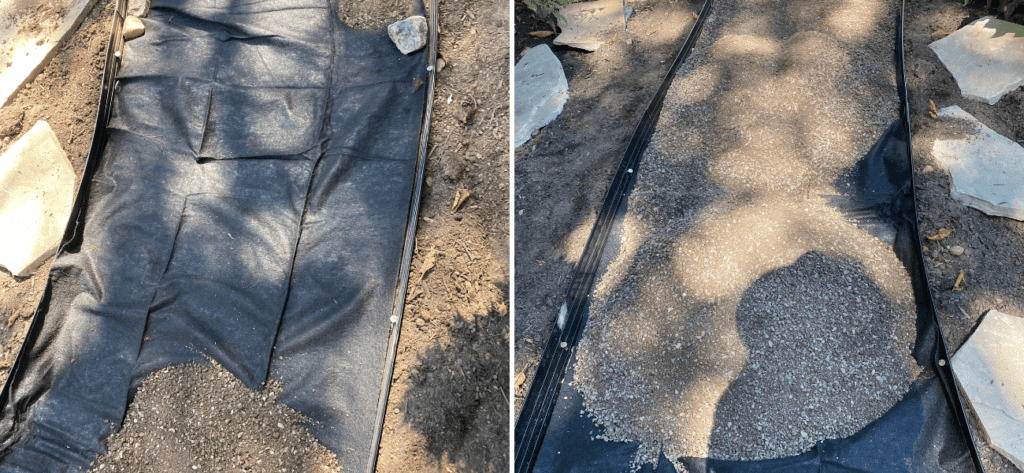
4. Lay Landscape Fabric and Weed Barrier
Lay landscape the fabric over the soil along the entire path. In areas where weeds like to grow, I used two layers of the landscape fabric. We secured the layer of landscape fabric with ground steel stakes.
5. Add Sand/Crushed Stone And Layer
Add one-quarter inch gravel (it’s part sand and gravel) or sand between edging or sides of the cut path. Pour approximately 2 inches over the landscape fabric, ensuring the top layer is about an inch thick. Smooth the sand or gravel mix with the back of a heavy rake or a wood board. If you have access to a tamper, use it! The idea is to create a level surface
Spray the path with a mist of water to help the filler compact before setting the stones.
6. The Stone Design
This is the fun part. I found it helpful to lay the stone near the path to see the sizes and shapes as you start to put the stone puzzle piece together. You will want to Alternate large and small stones and different shapes and colors for a natural, random look.
This is much easier than I thought it would be. How to set flagstone?
Installing Flagstone
Installing Flagstone
7. Install The Stones- The DYI flagstone patio with a Rubber Mallet
Begin placing stones into the sand bed of the walkway, fitting them together as for your desired pattern. Leave small gaps between stones if you fill the gaps with sand or gravel; leave wider gaps (about 2 inches) if you plant between the rocks.
Try to use flagstone pieces that are the same thickness. For informal designs, mix the larger stone with smaller stones (it’s a true jigsaw puzzle) to keep it an interesting tight fit.
The key is to place each stone, so it is stable (without rocking) and leveled with the surrounding stones. Add or remove sand beneath each stone to raise or lower it, as needed. If necessary, use a chisel and rock hammer to trim the flagstones to fit. Tap the flagstones with a rubber hammer to seat them in place.
Fill the space between the flagstones with sand or one-quarter-inch gravel then sweep the loose gravel into the crevices between the stones. Spray the entire flagstone design with a fine mist of water to settle the sand or gravel. Add additional sand or gravel as needed to reach the height of the flagstone. Finally, ensure to sweep away any excess sand from the surface and joints to maintain a proper fit and stability.
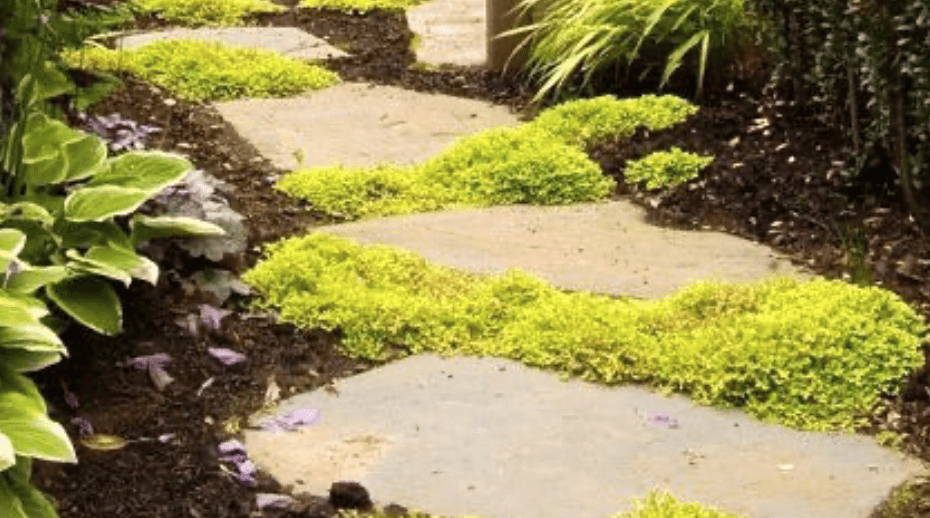
8. Plant And Or Decorate The Path
If you’re planting the walkway, fill the gaps with a potting soil mix, add “step-able” plants, such as wooly thyme, sedum, or bugleweed. Perhaps add rocks to line the path or? I used granite rocks on the edges of the path.
If you want to add some character to your garden- GO FOR IT! Trust me! I am so happy with the end result of my DYI project.
After we completed our garden path, we decided to transform a flagstone patio along the side of our house into a sitting area. With that project, we used large stones with a similar base material (gravel base).
We hired out this project on a square foot basis. The crew that installed the path and patio had professional power tools to create a smooth surface for our high traffic foot long path. I was happy not to do the heavy lifting!
Frequently Asked Questions: Stone Depth, Maintenance & Installation Time
1. Do I need to wait for the base layers to settle before using the path?
Yes, if you use mortar or a similar binding agent, allow 24–48 hours for proper curing before heavy use. If the stones are set in sand without mortar, the path may be usable sooner, but it’s wise to walk carefully until everything is fully compacted and stable.
2. What is the ideal depth for a flagstone path?
For a stable path, you typically excavate to a depth of about 4–8 inches. This allows space for a compacted gravel base and a leveling sand layer beneath the flagstones.
3. How thick should the gravel and sand layers be?
A common approach is to use about 3–4 inches of compacted gravel as a base and then 1–2 inches of sand on top. This combination provides both drainage and a stable surface for the flagstones.
4. Do I need mortar between the flagstones?
Mortar isn’t always necessary. Many people prefer setting the flagstones in sand for a natural, flexible look. However, if you’re looking for a more permanent solution, mortar can help secure the stones in place.
5. How do I keep the flagstones stable over time?
Proper initial installation is key. Ensuring that the gravel base is well-compacted and the sand layer is level will help prevent shifting. Over time, you might need to re-level the stones by adding more sand or adjusting any loose stones.
If you decided you want to set your stones in concrete then the process is a bit different. A flagstone patio or path requires a strong foundation. You may want to consider installing a concrete slab for the patio base. This should be poured at least 24 inches deep. If you live in an area with freezing temperatures, you might consider adding a thermal barrier between the concrete and the ground.
6. What About Maintenance?
Regular maintenance includes sweeping or rinsing off debris, inspecting for any loose stones, and refilling or re-leveling sand between the stones as needed. For mortar-set paths, periodic inspections for cracks and repointing may be necessary.
7. How can I prevent weed growth between the stones?
Laying landscape fabric under the base layers can help inhibit weed growth. Additionally, using polymeric sand in the joints can reduce weed emergence, though occasional weeding may still be needed.
8. Is it necessary to seal flagstones?
While not required, sealing your flagstone can protect against staining, weathering, and erosion, preserving the stone’s natural color and texture.
9. How long does it take to install a flagstone path?
The total installation time depends on the path’s size, complexity, and your experience level. A small to moderate flagstone path can often be installed in one to two days, while larger or more intricate designs may take several days to complete.
What factors affect the installation time?
Key factors include site preparation (clearing and excavation), weather conditions, the complexity of your design (curves or irregular shapes may take longer), and whether you’re working solo or with help. Each layer—excavation, laying the base, setting the stones, and finishing touches—adds to the overall time.
Let me know how it goes! Send me a note or pictures
Best,


Keep working ,great job!
I had no idea that flagstones could be used to beautify the appearance of your landscape. My brother is looking for ways to impress his in-laws since they plan to visit his home. I will recommend that he invest in flagstone products as a headstart by finding a masonry supplier.