Best strength training exercises for longevity experts say
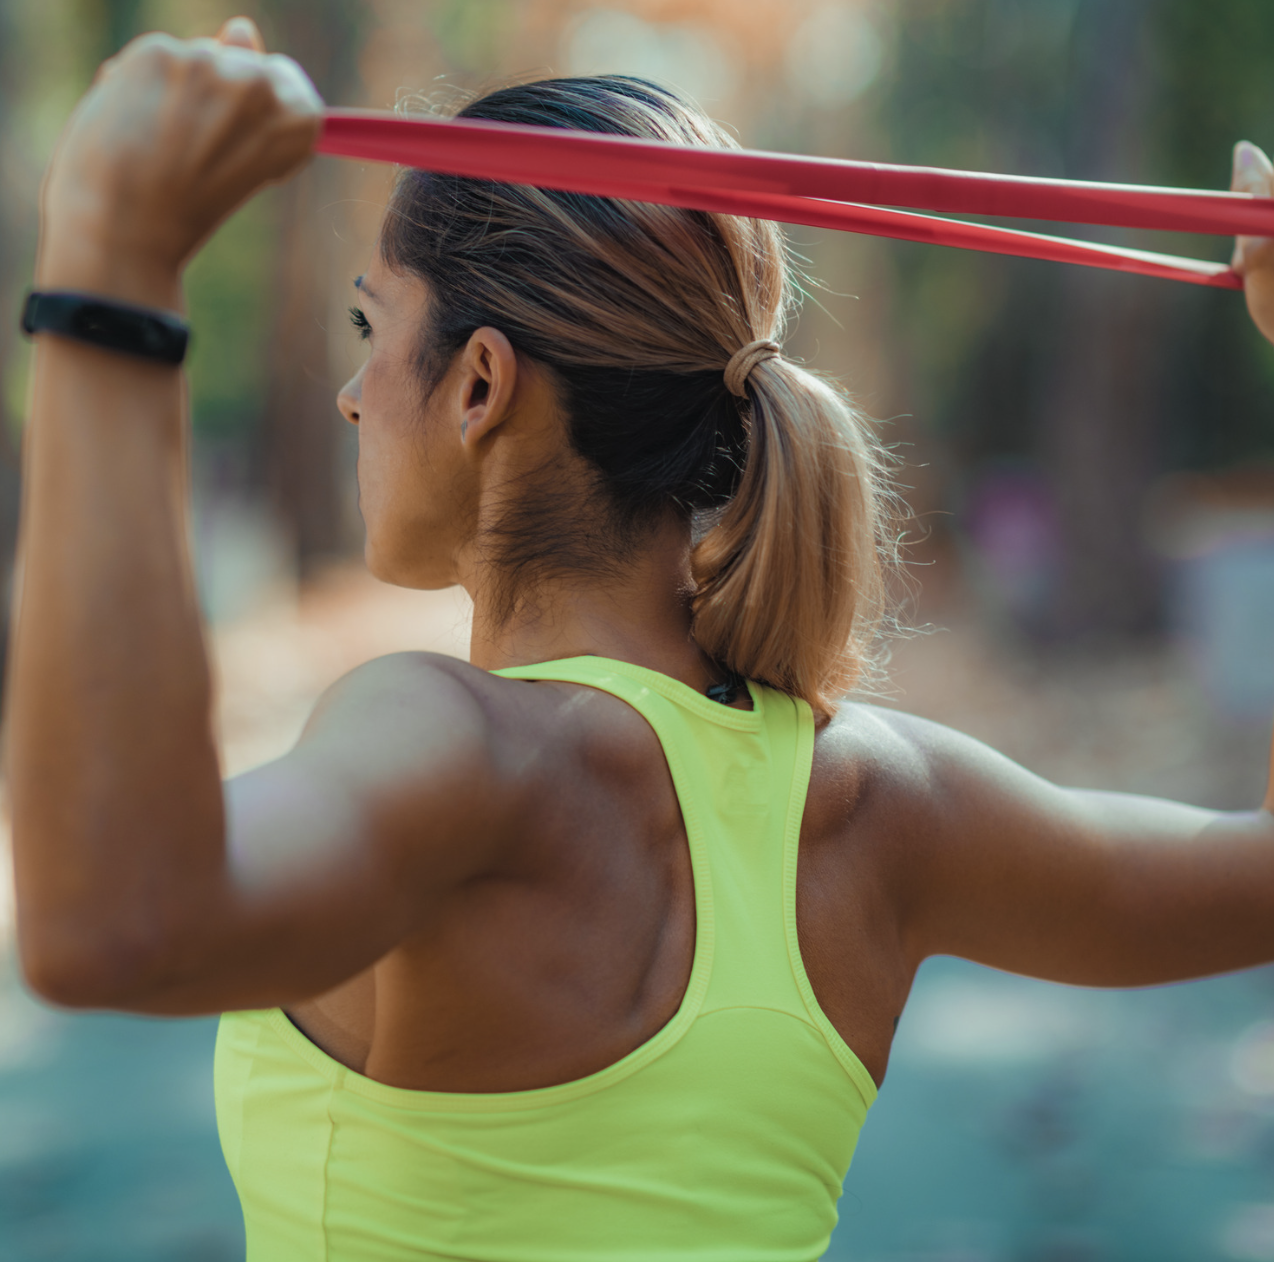
What if I told you that the key to unlocking one key to longevity could be as straightforward as lifting weights or using resistance bands? In this post, we share the some of the best strength training exercises for longevity. Experts weigh-in on longevity exercises.
It might sound almost too good to be true, but the science backing these claims is not only compelling – it’s downright astonishing.
Welcome to the world of routine resistance training–a journey that takes you beyond your comfort zone to unlock your hidden strength and help you live a longer, healthier life.
Research experts have discovered that adults who practice forms of resistance and strength training look and feel younger. This is because this form of exercise slows down the aging process considerably. There are 17 reasons every adult should be practicing some form of strength training weekly.
Reduce Your Risk For Common Health Issues By 20%-With Strength Training
So, get this—there’s this recent mega-analysis that looked into a bunch of studies involving over 1.5 million people.
And guess what? They found something pretty mind-blowing.
Turns out, when you dive into activities that amp up your muscle strength, you’re actually slashing your risk of stuff like heart problems, cancer, diabetes, lung issues, and even your overall chance of kicking the bucket by a whopping 20 percent! I mean, talk about a game-changer, right?
With that said, let’s talk about how to incorporate strength training into your weekly routine
“Exercise helps clear out cellular garbage and keeps our cells functioning optimally,” Sinclair says on an episode of his podcast, Lifespan. The process of cleaning out cellular junk—also known as autophagy—is triggered by putting your body through small amounts of stress. According to Sinclair, “exercise is one simple way to tap into autophagy, boosting cellular health.”
David Sinclair, Longevity Expert
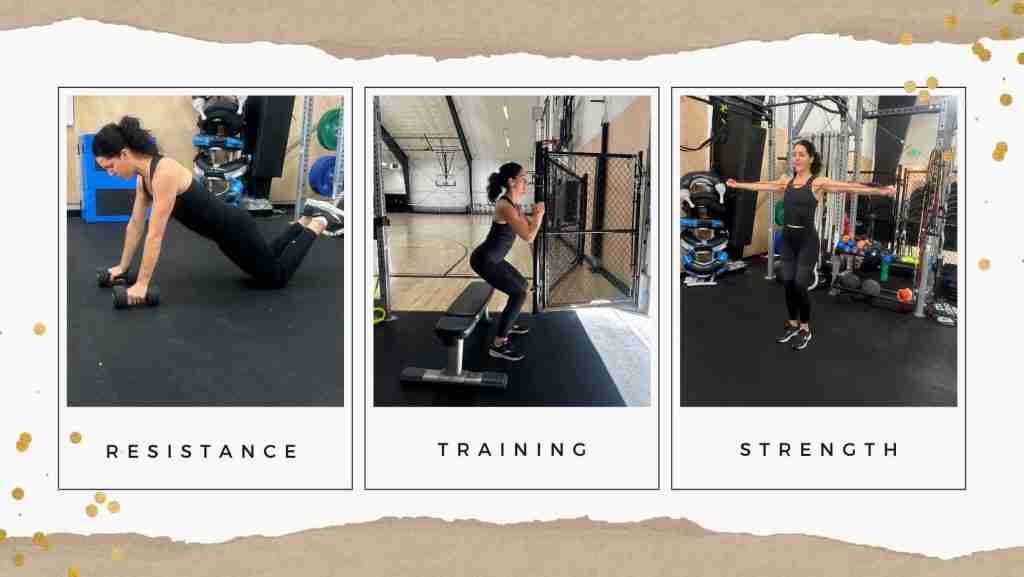
The Best Strength Training Exercises Experts Swear By
For those venturing into the world of resistance training, a mix of bodyweight exercises and exercises with free weights or weight. We will dive into some easy ideas for you to explore. Working on both upper and lower body muscle groups ensures a balanced workout routine.
Engaging in simple and quick exercises like squats, lunges, push-ups, and bicep curls can help older adults build and maintain muscle strength. Personal trainers can play an important role in guiding individuals through proper form and suitable exercises tailored to their fitness level and health goals.
Expert Advice For Effective and Easy Strength Training
Kristine Cox a lifelong competitive and former collegiate swimmer, shares her resistance training tips here. Kristine works as well as an ACE Certified Personal Trainer, and an AFAA Certified Group Fitness Instructor; she is also certified in TRX, indoor cycling, and Barre. She knows her stuff.
“Stability Exercises Lay the Essential Groundwork for Effective Strength Training”
Kristine Cox, Expert Trainer and Swim Coach
Kristine knows how important stability exercises is.Before diving into more intense workouts, it’s crucial to establish a solid foundation of stability.
These exercises focus on improving your balance and control by engaging your core and smaller stabilizing muscles. By honing your stability, you create a sturdy platform that allows your body to handle more challenging movements safely and efficiently.
“
“There are so many different ways to strength train – barbells, dumbbells, kettlebells, cable machines, body weight, Trx, there is honestly something for everyone. But just make sure to do what you enjoy. You will be more inclined to stick with a strength program. If you love what you are doing.”
— Kristine Cox, Expert Personal Trainer
Starting With Stability Exercises
When you start with stability exercises, you’re essentially building a strong base that prevents injury and supports proper form. As you progress, your body becomes better equipped to handle the resistance and intensity that come with traditional strength training exercises.
Kristine shares a simple resistance training exercises with variations to give you a place to start.
14 Simple Resistance Exercises For Everyone
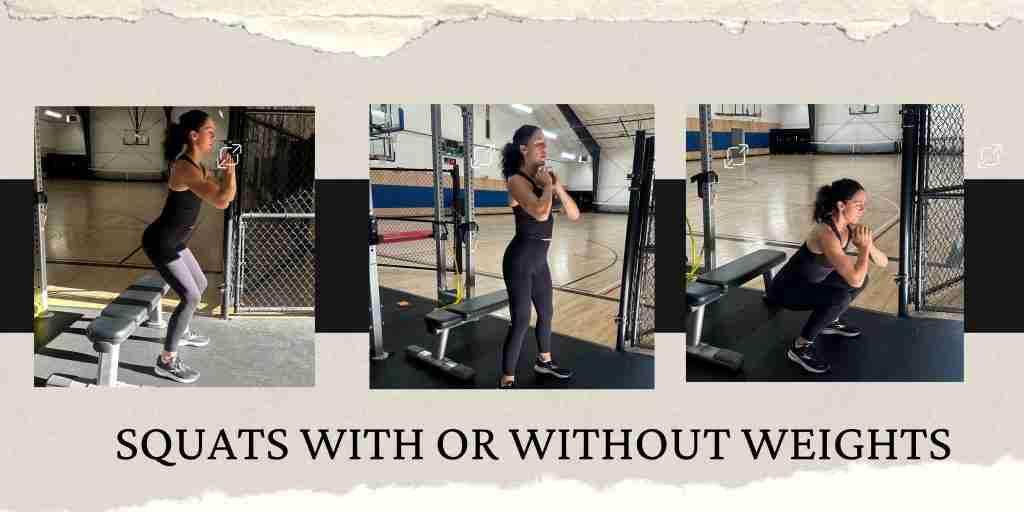
1. Bodyweight Squats:
Bodyweight squats are a great lower body exercise that can be modified using a bench or a chair for added support or to make the movement more challenging. Here’s how to perform bodyweight squats both with and without a bench or chair:
A. Bodyweight Squats Without a Bench or Chair:
Setup For Body Weight Squats Without a Bench or Chair
Stand with your feet slightly wider than shoulder-width apart.
Point your toes slightly outward.
Execution:
Start the movement by pushing your hips back and bending your knees.
Hold onto something if you need to feel better stabilized.
Lower your body down as if you’re sitting back into an imaginary chair.
Keep your chest up, back straight, and your weight balanced on your heels.
Lower yourself until your thighs are at least parallel to the ground, or as far as your flexibility allows.
Ascent:
Push through your heels to rise back up to the starting position.
Straighten your legs and return to the standing position.
Repetitions:
Complete the desired number of repetitions while maintaining proper form.
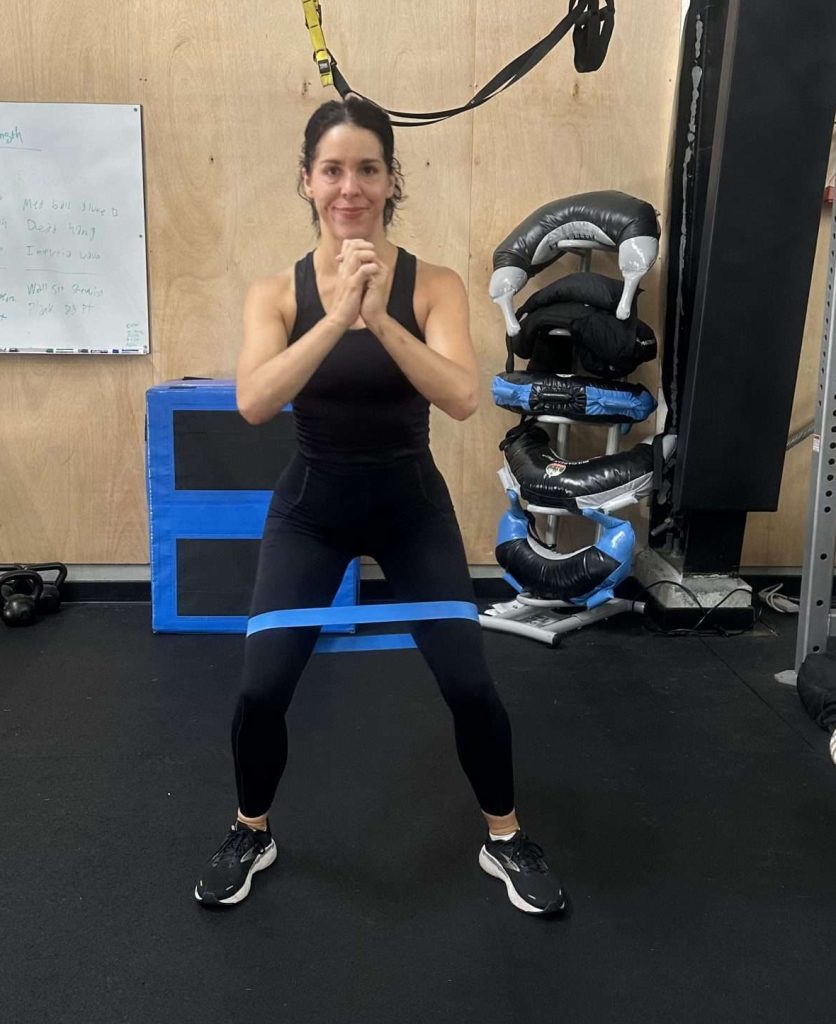
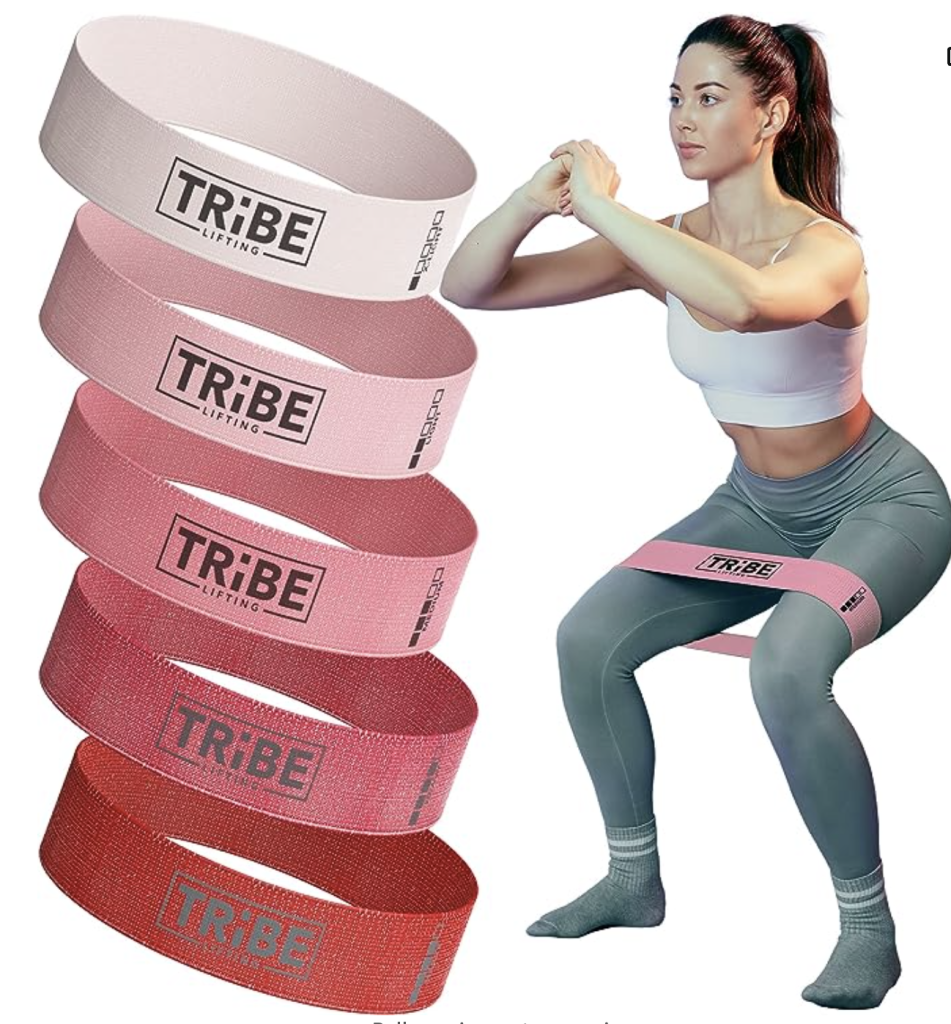
B. Bodyweight Squats with Resistance Band
Squats with resistance bands are a great way to add extra challenge and variety to your squatting routine.
Resistance bands can help activate different muscle fibers and provide continuous tension throughout the movement. Here’s how you can perform squats with resistance bands:
A. How To Do Squats With A Resistance Band
Setup:
Place a resistance band just above your knees or around your thighs, depending on the type of resistance you’re looking for.
Stand with your feet about shoulder-width apart, toes slightly pointed outward.
The resistance band should be stretched and provide a bit of tension even when you’re standing in the starting position.
Execution:
Engage your core and keep your chest up, looking straight ahead.
Begin the squat by pushing your hips back and bending your knees, as if you’re sitting back into an imaginary chair.
As you squat down, press your knees out against the resistance of the band. This helps engage the glute muscles more effectively.
Keep your weight balanced over your midfoot and heels, not just your toes.
Depth:
Lower yourself until your thighs are at least parallel to the ground, or as far as your flexibility and comfort allow. Your knees should be in line with your toes.
Tips for Proper Form in Both Variations:
Keep your chest up and your back straight throughout the movement.
Ensure that your knees track over your toes and don’t collapse inward.
Engage your core muscles for stability.
Push through your heels as you rise to the standing position.
If you’re using a bench or chair, make sure it’s stable and won’t slide.
Using a bench or chair can provide assistance for those who are new to squats or have limited mobility. As you become more comfortable and confident, you can transition to performing squats without any external support. Squats are an excellent way to strengthen your lower body muscles, including your quadriceps, hamstrings, and glutes.
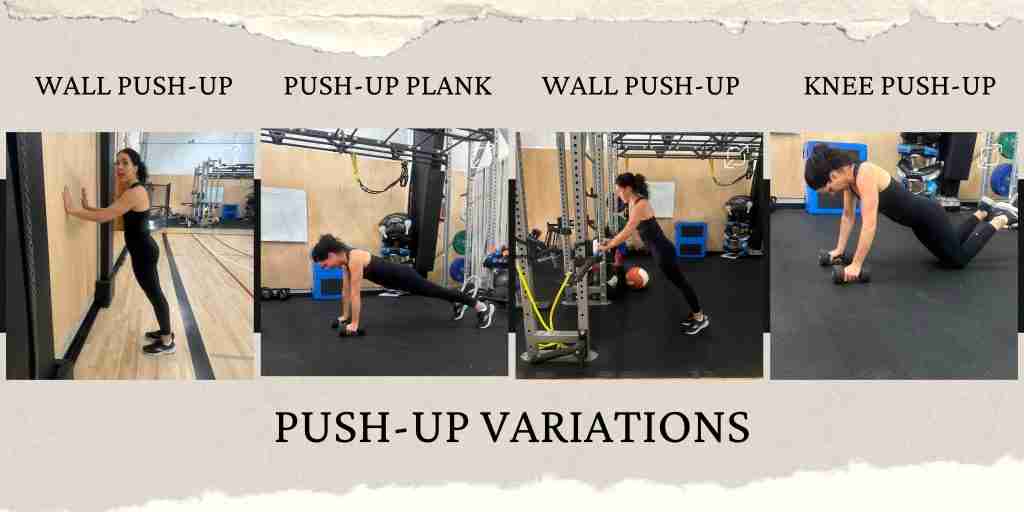
2. Push-Up Variations
A. Push-Ups On The Floor Or With Weights:
Place dumbbells or weight plates on the ground, about shoulder-width apart. Assume a standard push-up position with your hands on the weights.
Lower your body as you would in a regular push-up, keeping your body in a straight line. Push back up to the starting position.
This variation adds resistance to your push-ups, making them more challenging and effective for building strength.
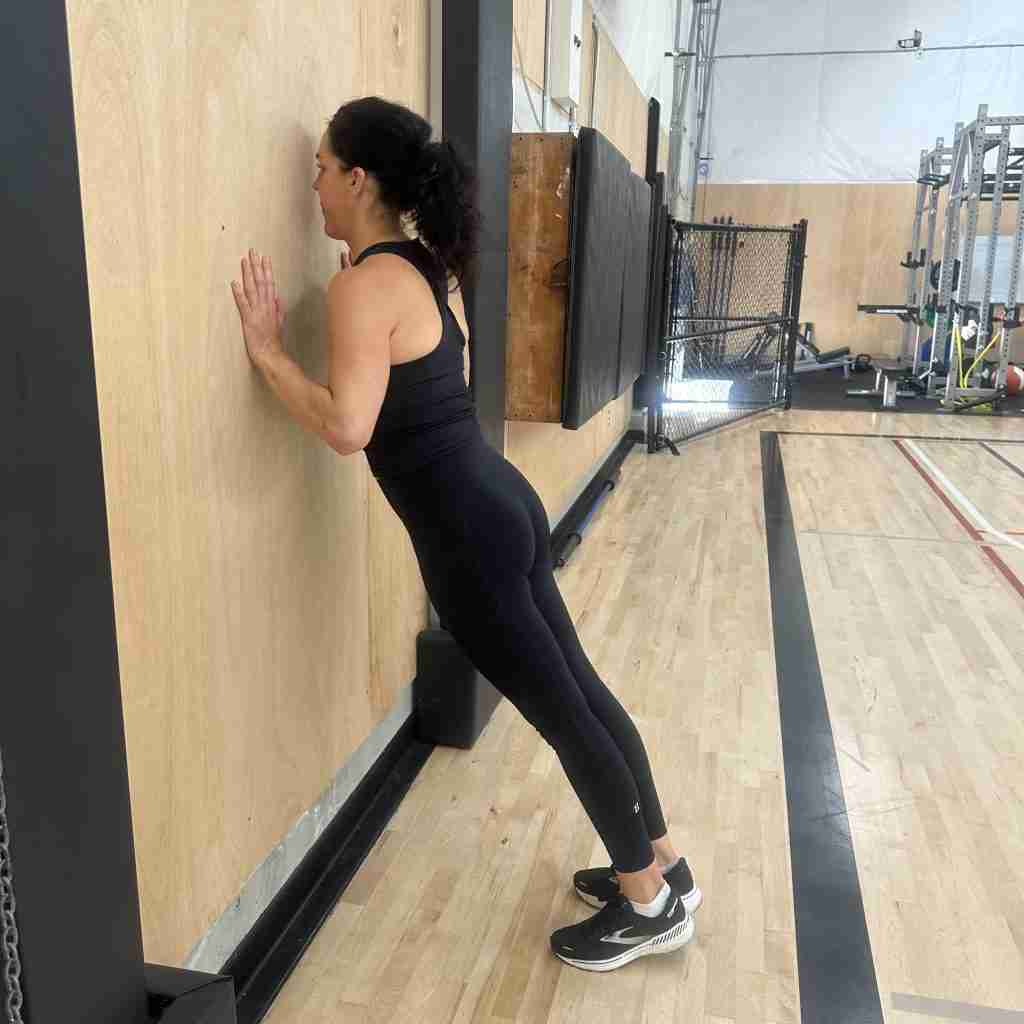
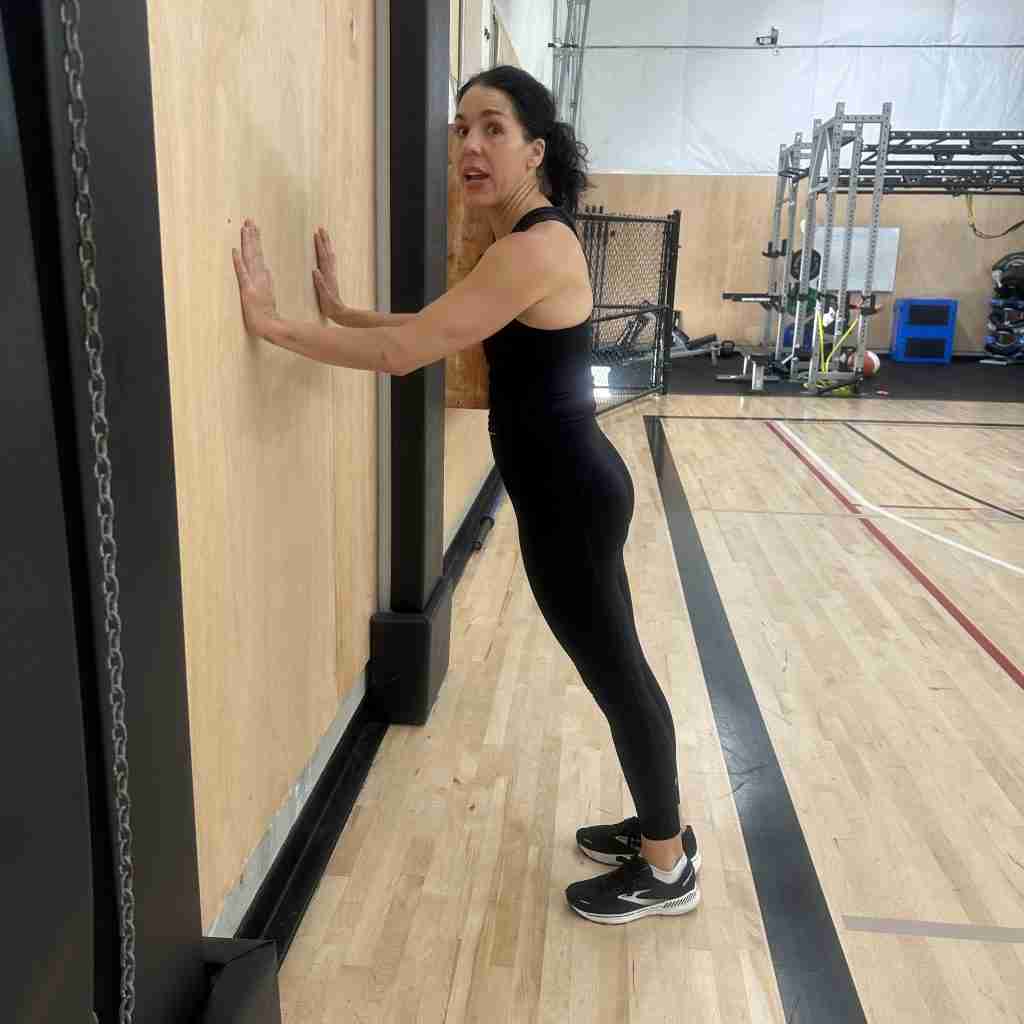
B. Wall Push-Up Variation:
Stand facing a wall at arm’s length distance. Place your hands on the wall at shoulder height, slightly wider than shoulder-width apart.
Lean your body forward and keep your feet planted as you bend your elbows and lower your chest toward the wall. Push back to the starting position.
Wall push-ups are a great modification for individuals who are to push-ups or who want to work on building strength before progressing to standard push-ups.
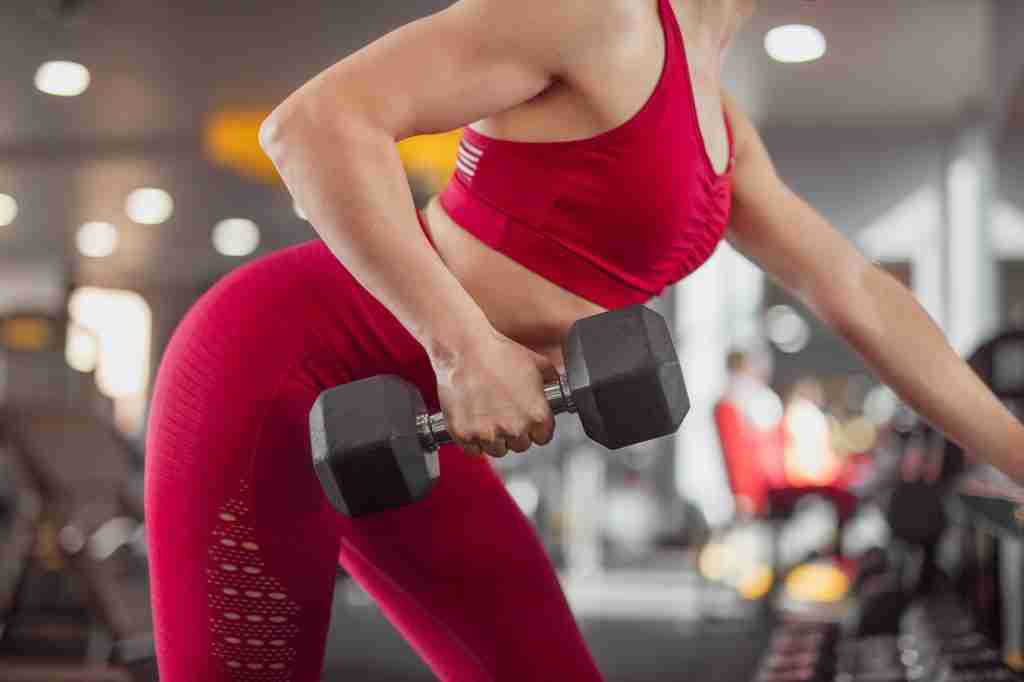
3. Dumbbell Rows:
A dumbbell row is a compound exercise that primarily targets the muscles of the upper back, including the lats, rhomboids, and trapezius. Here’s how to perform a dumbbell row:
A. How To Set Up For Dumbbell Rows:
Setup:
Choose a dumbbell of an appropriate weight.
Stand beside a bench or a sturdy surface that is about knee height.
Place the dumbbell on the ground next to the bench.
Execution:
Begin by placing your left knee and left hand on the bench, keeping your back straight and parallel to the ground. Your right leg should be extended behind you for stability.
Reach down with your right hand and pick up the dumbbell off the ground. This is your starting position.
Keep your core engaged and your back flat throughout the movement.
Rowing:
Hold a dumbbell in one hand and bend forward at your hips, keeping your back straight. Pull the dumbbell up towards your hip while keeping your elbow close to your body. Lower it back down and repeat.
Squeeze your back muscles at the top of the movement, holding the position for a brief moment.
Slowly lower the dumbbell back to the starting position with control.
Repetitions:
Complete the desired number of repetitions on one side before switching to the other side.
Breathing:
Exhale as you pull the dumbbell up (concentric phase).
Inhale as you lower the dumbbell down (eccentric phase).
Hand Weights- Amazon
HolaHatha Neoprene Dumbbell Free Hand Weight Set with Storage Rack, Ideal for Home Gym Exercises to Gain Tone and Definition
Keep your neck aligned with your spine by looking down slightly.
Avoid using momentum to lift the weight; use controlled movements.
Imagine pulling your elbow towards the ceiling rather than simply lifting the dumbbell.
Keep your shoulders square and avoid twisting your torso.
Maintain a stable and engaged core to support your back.
The dumbbell row is a great exercise for building upper back strength and improving posture.
Gradually increase the weight as you become more comfortable with the movement and ensure that you’re performing the exercise with proper form to avoid any strain or injury. If you’re new to weightlifting, it’s always a good idea to seek guidance from a fitness professional.
4. Resistance Band Bicep Curls:
Resistance band bicep curls are a fantastic way to target and strengthen your biceps using the resistance provided by a band. Here’s how you can perform resistance band bicep curls:
A. Resistance Band Exercise Tips:
Choose the Right Band:
Select a resistance band with an appropriate level of resistance for your fitness level. Bands come in various colors, each indicating a different resistance level.
Setup:
Stand on the center of the resistance band with your feet about shoulder-width apart.
Grasp the handles of the resistance band, one in each hand, with your palms facing forward.
Allow your arms to fully extend downward, and keep your elbows close to your sides.
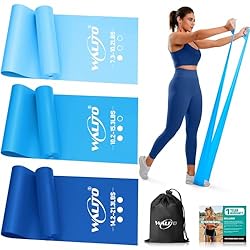
Resistance Bands- Amazon
Resistance Bands 5-pack: Workout sets for women, 5 resistance bands for stretching and strength training. Everyone can get suitable one for Yoga, physical therapy and pilates.
Begin the movement by flexing your elbows, bringing your hands towards your shoulders while keeping your upper arms stationary.
As you curl the resistance band, focus on contracting your biceps and maintaining control over the movement.
Continue curling until your hands are close to your shoulders, and your biceps are fully contracted.
Lowering Phase:
Slowly extend your elbows, resisting the pull of the band, to return to the starting position.
Keep your upper arms stationary throughout the movement.
Repetitions:
Complete the desired number of repetitions while maintaining proper form.
Breathing:
Exhale as you curl the resistance band (concentric phase).
Inhale as you lower the resistance band (eccentric phase).
Tips for Proper Form Of The Resistance Band:
Keep your wrists in a neutral position throughout the movement.
Maintain good posture with your chest up and shoulders back.
Avoid swinging or using momentum to lift the band. Focus on controlled movements.
Keep your core engaged to stabilize your body.
If the resistance band is too long, you can step on the excess portion or wrap it around your hands to create more tension.
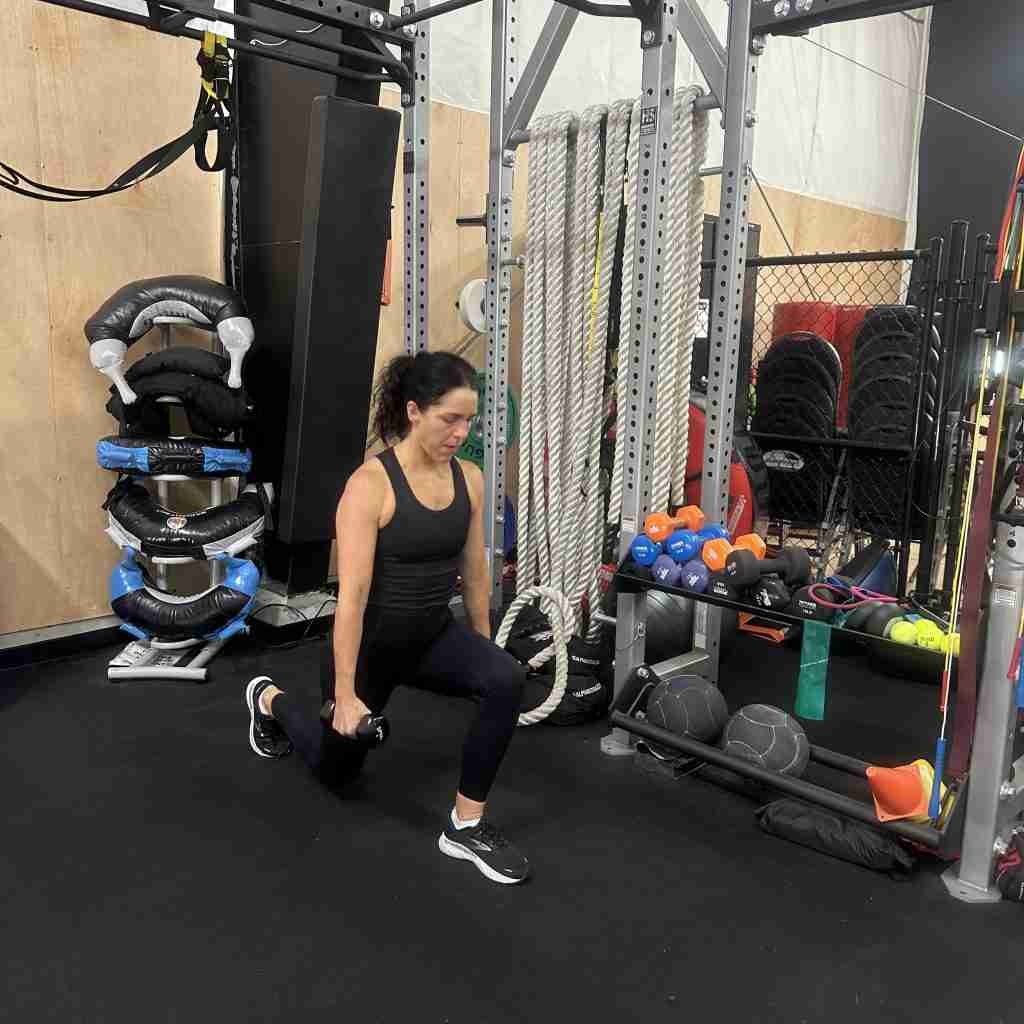
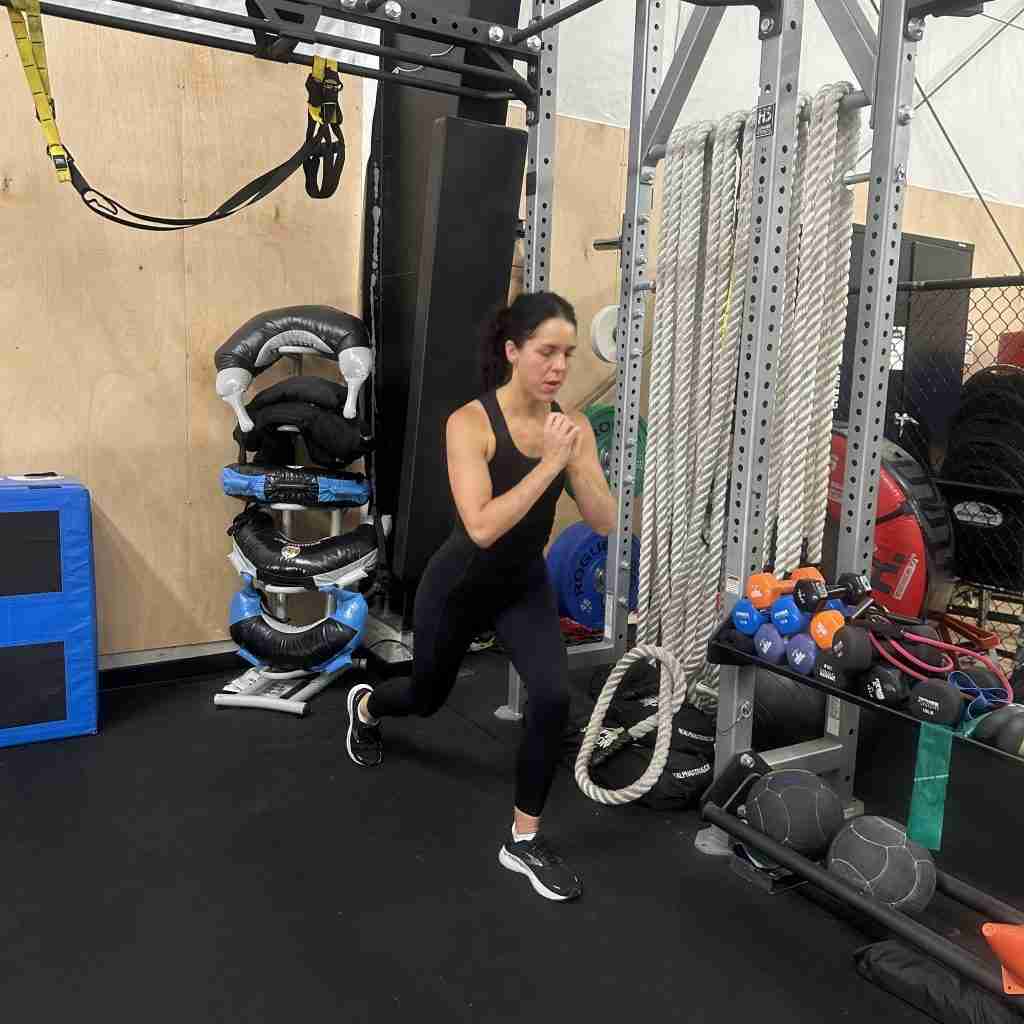
5. Lunges For Strength Training
A lunge is a lower body exercise that targets the muscles of your legs, including your quadriceps, hamstrings, glutes, and calves. It’s a versatile exercise that can be performed with body weight or using additional weights like dumbbells or a barbell. Here’s how to perform a basic forward lunge:
A. Proper Lunge Form and Execution:
Setup:
Stand up straight with your feet hip-width apart.
Keep your shoulders back and your chest up. Engage your core muscles to stabilize your torso.
Execution:
Take a step forward with one leg, ensuring that your stride is long enough to create a 90-degree angle with both knees when you lower down.
Lower your body by bending both knees. Your front knee should be directly above your ankle, and your back knee should hover above the ground.
Keep your weight on the heel of your front foot as you lower down to prevent your front knee from going past your toes.
Aim to lower your back knee to a few inches above the ground, without letting it touch.
Keep your upper body upright and your core engaged throughout the movement.
Return to Starting Position:
Push through the heel of your front foot to straighten both legs and return to the starting position.
You can either step your back foot forward to return to a standing position or step directly back into another lunge on the opposite leg.
Repetitions:
Perform the desired number of repetitions on one leg before switching to the other leg.
Keep your upper body straight and avoid leaning too far forward or backward.
Make sure your knees are tracking in line with your toes, and your knees should not collapse inward.
Your back knee should be hovering above the ground and not slamming into it.
Engage your core muscles throughout the movement to maintain stability and control.
To add challenge, you can hold dumbbells by your sides, on your shoulders, or in a goblet position.
Take a step forward with one leg and lower your body until both knees are bent at 90-degree angles. Push through your front heel to return to the starting position.
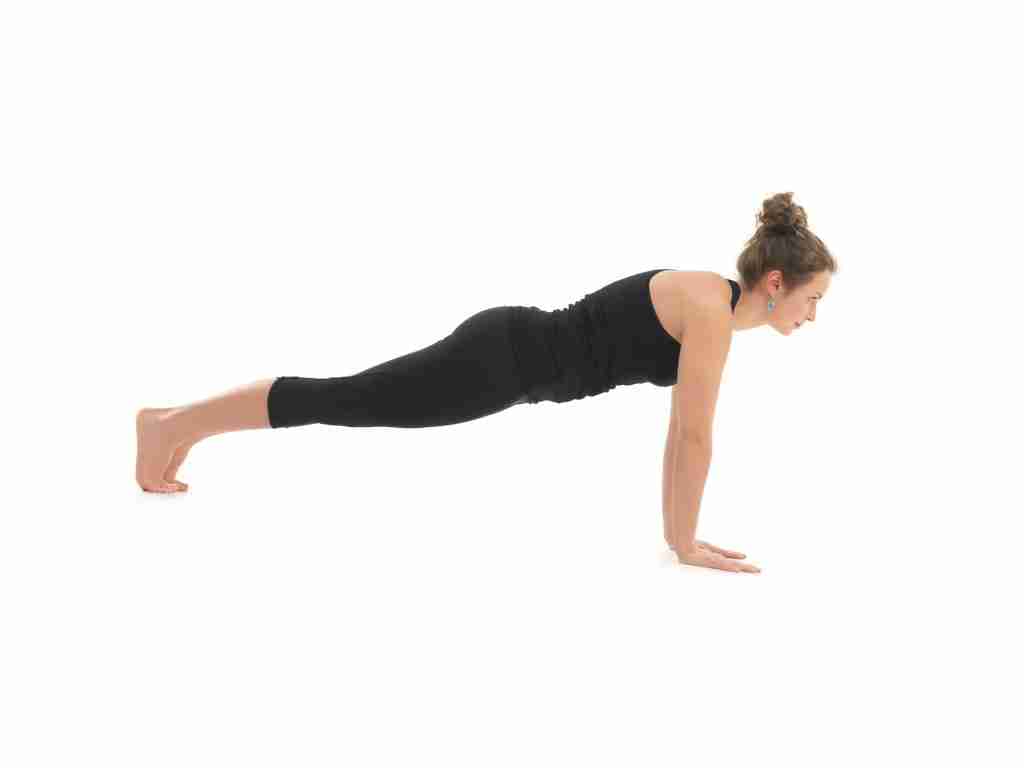
6. Planks Exercises
The plank exercise is a popular and effective bodyweight exercise that primarily targets the muscles in your core, including your abdominals, obliques, and lower back. It is a static exercise, meaning you hold a specific position rather than performing repetitive movements.
To perform a proper plank exercise:
Start by getting into a push-up position on the floor, with your hands directly under your shoulders and your toes resting on the ground.
Engage your core muscles by pulling your navel towards your spine. This will help stabilize your body and prevent your hips from sagging.
Keep your body in a straight line from your head to your heels. Avoid raising your hips too high or letting them droop too low.
Focus on maintaining a neutral neck and spine alignment. Keep your gaze directed slightly in front of your hands to avoid straining your neck.
Hold this position for as long as you can maintain proper form. Aim for at least 20-30 seconds to start, and gradually increase the duration as you become more comfortable and stronger.
The plank exercise is versatile and can be modified in several ways to increase or decrease the difficulty. Some variations include side planks, forearm planks, and elevated planks.
It’s important to maintain proper form and listen to your body to avoid any discomfort or injury. Planks are a great addition to your workout routine to help build core strength and stability.
Start in a push-up position, but with your weight on your forearms instead of your hands. Hold your body in a straight line from head to heels.
Another form Of a Leg Raise with a Ball
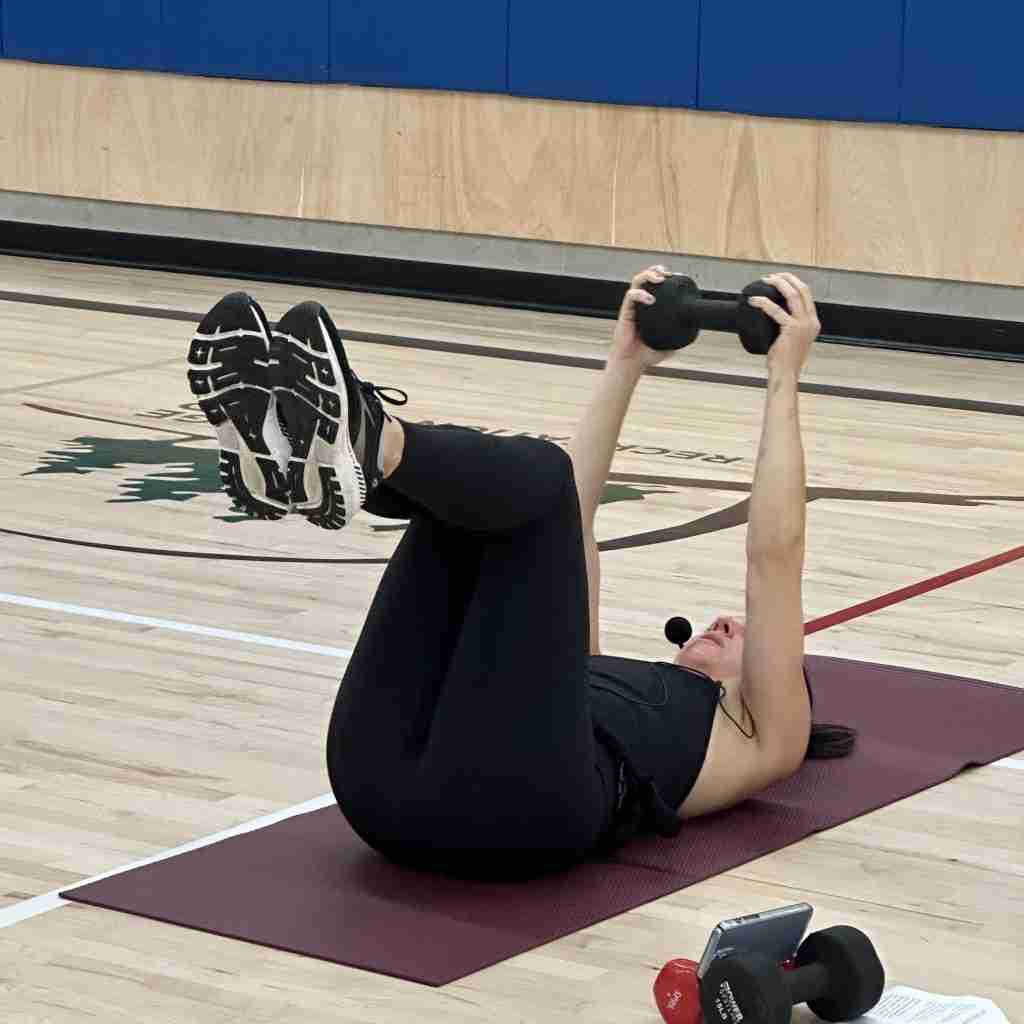
7. Leg Raises For Resistance Exercises
A leg raise exercise is a strength training exercise that targets the muscles of the lower abdomen, particularly the hip flexors and the lower part of the rectus abdominis (the “six-pack” muscle). It’s a bodyweight exercise that can be performed on the floor or using specialized equipment like a captain’s chair or dip station. Leg raises can help improve core strength and stability, as well as enhance overall abdominal definition.
Here’s how to perform a basic leg raise exercise:
1. Floor Leg Raise:
Lie flat on your back on a mat or the floor.
Place your hands palms-down under your hips for support or tuck them under your lower back for added comfort.
Keep your legs straight and together, with your toes pointed.
Engage your core muscles to stabilize your lower back against the floor.
Slowly lift your legs off the ground while keeping them straight. Lift them towards the ceiling.
Continue lifting until your legs are perpendicular to the floor or as far as your flexibility allows.
Lower your legs back down to the starting position with control.
Avoid swinging or using momentum to lift your legs.
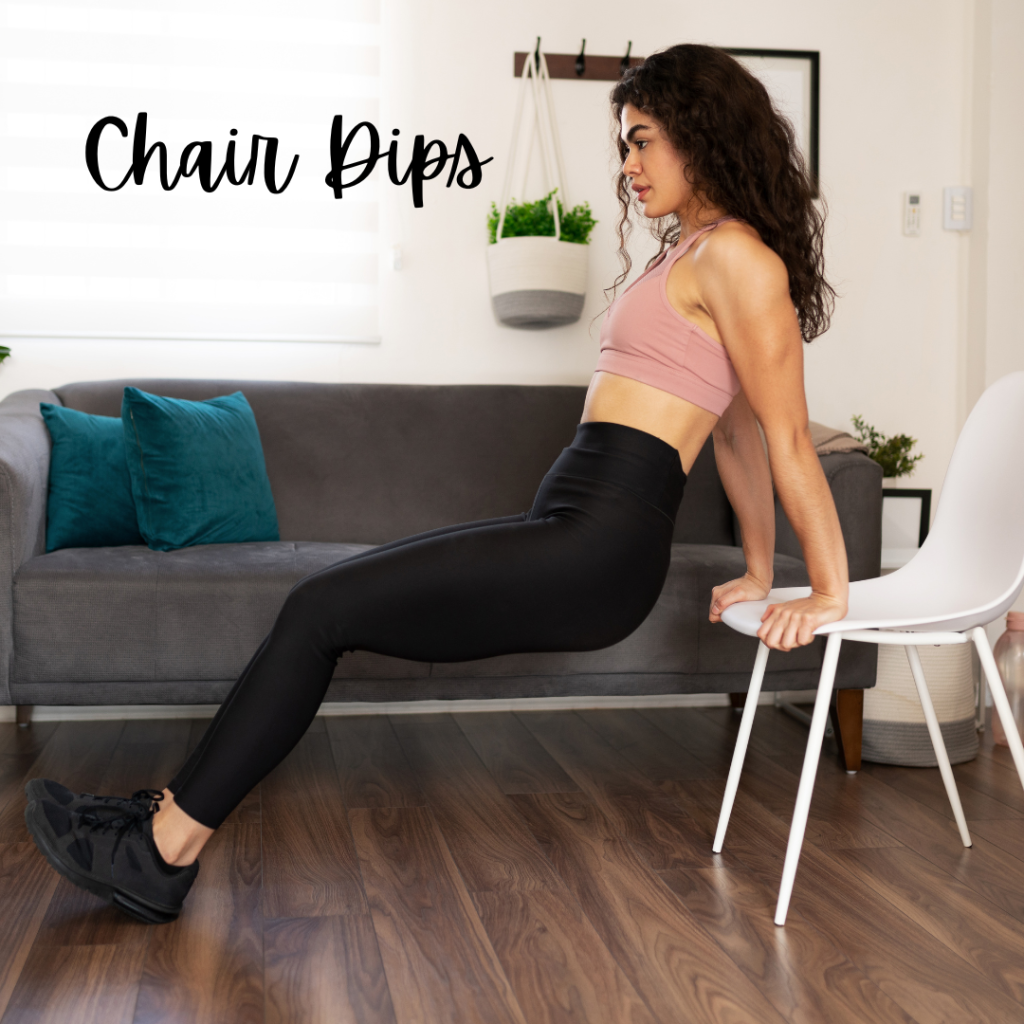
8. Chair Dips For Resistance Training
To perform a chair dip, follow these steps:
Setup:
Find a sturdy chair or bench that can support your body weight.
Place the chair behind you and make sure it won’t slide or move during the exercise.
Sit on the edge of the chair, with your hands gripping the front edge of the seat. Your fingers should be pointing forward, and your palms should be facing downward.
Starting Position:
Slide your hips forward off the edge of the chair, keeping your feet flat on the ground and your knees bent at approximately 90 degrees. Your hands should be supporting your body weight.
Execution:
Lower your body by bending your elbows, allowing your hips to move downward toward the floor. Keep your elbows pointed back and close to your body.
Lower yourself until your upper arms are parallel to the ground or slightly below, feeling a stretch in your triceps and chest.
Avoid letting your shoulders shrug up toward your ears; keep them down and engaged.
Keep your core muscles engaged to stabilize your body.
Return to Starting Position:
Push through your palms to extend your elbows and raise your body back to the starting position.
Fully extend your arms, but don’t lock your elbows at the top.
Repetitions:
Perform the desired number of repetitions. Start with a manageable number and gradually increase as you become more comfortable and stronger.
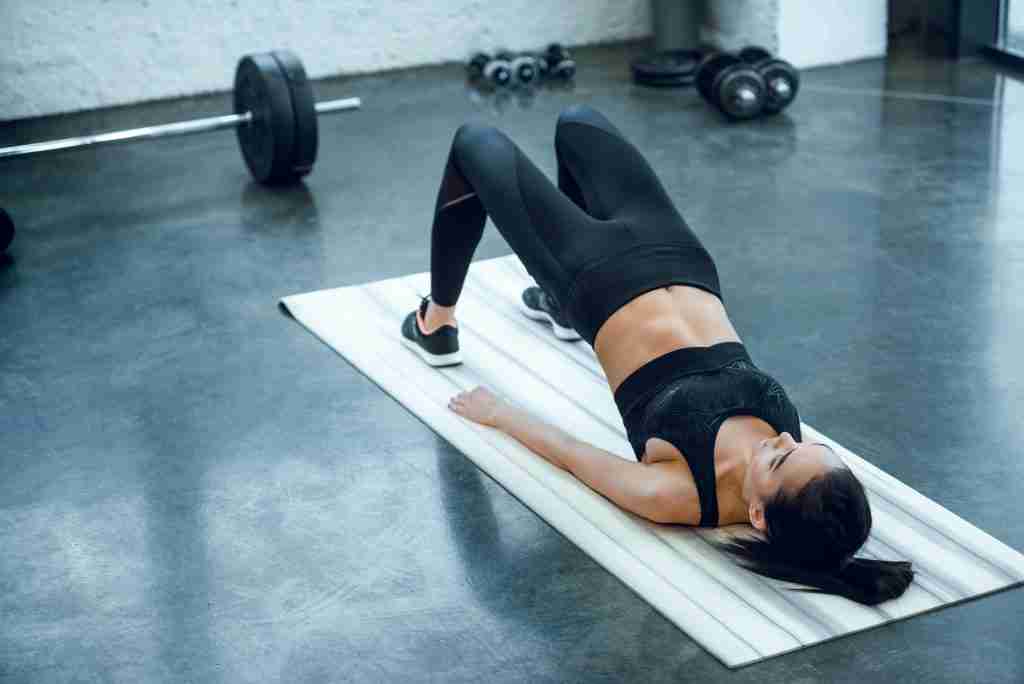
young sporty woman doing bridge exercise at gym
9. Bridges For Resistance Training
The bridge exercise is a great way to strengthen your glutes, lower back, and core muscles while also improving hip mobility. Here’s how to perform a basic bridge exercise:
Setup:
Lie on your back on a comfortable and flat surface, such as an exercise mat.
Bend your knees and place your feet flat on the ground, hip-width apart.
Your arms should be relaxed at your sides, palms facing down.
Execution:
Engage your core muscles by gently pulling your navel toward your spine.
Begin the movement by pressing through your heels and lifting your hips off the ground.
As you lift, your body should form a straight line from your shoulders to your knees at the top of the movement.
Squeeze your glutes at the top to ensure you’re using your posterior chain muscles.
Hold:
Hold the bridge position for a few seconds, focusing on keeping your core engaged and your hips lifted.
Descent:
Lower your hips back down to the ground with control, vertebra by vertebra, until your lower back and hips touch the ground.
Repetitions:
Complete the desired number of repetitions, or you can hold the bridge position for a certain amount of time.
Tips for Proper Form:
Avoid arching your lower back excessively. Your goal is to create a straight line from shoulders to knees.
Keep your feet hip-width apart and parallel.
Keep your neck relaxed and your chin slightly tucked, without straining it upward.
Breathe naturally throughout the exercise.
Focus on using your glutes to lift your hips, rather than pushing through your feet.
If you feel any discomfort in your lower back, adjust your form or consult a fitness professional.
Variations and Progressions:
To make the exercise more challenging, you can lift one leg off the ground while holding the bridge position.
You can also try elevating your feet on a stable surface or using a stability ball under your feet.
For more advanced variations, you can try single-leg bridges or hip thrusts with added weight.
The bridge exercise is a versatile movement that can be incorporated into your warm-up, cool-down, or strength training routines. It’s effective for building core and glute strength, improving hip mobility, and stabilizing the lower back.
Biceps Exercise with Dumbbells. Strength Training.
10. Bicep Curl With Hand Weights
A. How To Do A Proper Bicep Curl
Starting Position: Stand up straight with a dumbbell in each hand, arms fully extended, and palms facing forward. Keep your elbows close to your torso.
Lifting Phase: While keeping your upper arms stationary, exhale and curl the weights while contracting your biceps. Continue to raise the weights until your biceps are fully contracted, and the dumbbells are at shoulder level. Hold the contracted position for a brief pause as you squeeze your biceps.
Lowering Phase: Inhale and slowly begin to lower the dumbbells back to the starting position.
Repeat: Repeat for the recommended amount of repetitions.
It’s important to maintain proper form throughout the exercise. Avoid using your back or shoulders to lift the weight; focus on isolating the movement to your biceps. Bicep curls can be performed with various types of equipment, including dumbbells, barbells, resistance bands, or even using your own body weight in certain variations.
11. Skull Crusher With Weights
A skull crusher, also known as a lying triceps extension, is a weightlifting exercise that primarily targets the triceps muscles located on the back of your upper arms. It’s a great exercise for building strength and muscle definition in the triceps.
A. Here’s how you perform a skull crusher:
Starting Position: Lie on a bench with your back flat and your feet on the floor. Hold a barbell, dumbbells, or an EZ-curl bar with an overhand grip (palms facing away from you). Extend your arms fully so that the weight is directly above your chest, and your arms are perpendicular to the floor.
Lowering Phase: Keeping your upper arms stationary, slowly lower the weight towards your forehead by bending your elbows. The motion should resemble the movement of a door hinge, hence the name “skull crusher.” Your forearms should be moving, and your upper arms should remain still.
Lifting Phase: Once the weight is close to your forehead or when you feel a stretch in your triceps, extend your elbows and raise the weight back to the starting position. Fully extend your arms, but avoid locking out your elbows.
Repeat: Perform the desired number of repetitions while maintaining control over the movement.
Training shoulders with weights
12. Bent Elbow Raise
This exercise is ideal to keep your shoulders strong.
A. Variation #1: Let’s give the Seated Bent-Arm Lateral Raise a go.
Take a seat, making sure your chest is up and your shoulders are relaxed. Your elbows should be close to your sides, forming about a 90-degree angle. Now, create soft fists with your hands, with your palms facing each other.
Here’s the move: Keep those elbows bent and start lifting them up to around shoulder height. Then, gently bring them back down to the starting point. Remember, as you raise and lower those elbows, give your arm muscles a little squeeze to amp up the challenge.
B. Variation #2: Time to Add Some Weight.
While seated, grab a couple of light dumbbells. As you get more comfortable, you can switch to heavier ones or even mix up the pace. Think about slowing down the motion or alternating between a slow lift and a regular-speed one.
Stay connected and make sure your form is on point. If you’re rushing or feeling discomfort, consider using lighter weights or even doing the exercise without weights altogether.
C. Variation #3: Ready to Stand Up.
Stand up tall, keeping your feet hip-width apart. Loosen those knees a bit and roll your shoulders back and down. Now, you can totally try that bent-arm lateral raise, whether you want to hold dumbbells or not.
D. Variation #4: Let’s Mix It Up with a Split Stance.
Stand with one foot slightly ahead of the other. Toes forward, heels down. Keep your weight balanced between your feet. Try that bent-arm lateral raise, either with or without dumbbells. Oh, and don’t forget to switch your feet halfway through your set.
Stay in the loop by subscribing to our newsletter. And always listen to your body – if things feel rushed or uncomfortable, go for lighter weights or just do the exercise without them. Your pace, your progress.
13. Floor Exercises
A. Dead bug Stability Exercise
The bird dog presents a straightforward core workout, enhancing stability, fostering spinal neutrality, and alleviating lower back discomfort.
Employing the entire body, this exercise effectively engages and fortifies the core, hips, and back muscles.
Additionally, it contributes to optimal posture and an expanded range of motion. Appropriate for individuals at various fitness stages, including seniors, it serves as a preventative measure against injuries, spinal alignment aid, and a recovery tool for addressing lower back pain.
B. How To Do A Dead Bug Exercise:
Starting Position:
Begin on your hands and knees in a tabletop position. Your hands should be aligned under your shoulders and your knees under your hips.
Ensure your spine is in a neutral position, neither overly arched nor rounded.
Engage Core Muscles:
Gently engage your core muscles by drawing your navel towards your spine. This helps stabilize your torso throughout the movement.
Leg Extension:
Simultaneously extend your right leg straight back behind you while keeping your hips level and your toes pointed towards the ground. Your leg should be in line with your body.
Avoid arching your back or lifting your leg too high.
Arm Extension:
At the same time, reach your left arm straight forward, parallel to the ground. Your arm should be in line with your body and your palm facing inwards.
Keep your shoulders level and avoid hunching or rotating excessively.
Hold and Balance:
Hold this extended position for a few seconds, focusing on maintaining stability and balance.
Imagine you’re trying to reach as far as possible with your arm and leg without compromising your form.
Return to Starting Position:
Slowly bring your extended arm and leg back to the starting position, returning to the tabletop stance.
Be mindful not to let your arm or leg drop suddenly; control the movement throughout.
Switch Sides:
Repeat the same steps with your left leg and right arm.
Repetitions:
Start with a few repetitions on each side, gradually increasing as you become more comfortable with the exercise.
Work In Resistance Exercises While Multi-tasking
Kristine Cox shares some easy ways to incorporate your exercises into your daily routine.
A. Incorporate Resistance Training Into Your Daily Routine
a. Incline push-up on the counter while cooking dinner
b. Pulsing plie squats while brushing teeth
c. Dead-bug and bird-dog while watching evening TV
d. Calf Raises while drinking morning coffee
e. Keep a light set of weights at your office desk – add in bicep curls and some front and lateral raises throughout the day
Remember to start with a weight or resistance level that is comfortable for you and gradually increase as you get stronger. Also, focus on proper form to avoid injury. If you’re new to exercise or have any health concerns, it’s a good idea to consult with a healthcare professional before starting a new workout routine.
Don’t overthink It
Resistance training doesn’t necessarily require an elaborate gym setup. Simple activities like yard work, gardening, and even lifting household items can contribute to muscle-strengthening. For those seeking a more structured approach, using resistance bands or participating in classes like tai chi can yield great results.
The Department of Health and Human Services recommends at least 150 minutes of moderate-intensity aerobic activity per week for adults, along with muscle-strengthening activities on two or more days a week.
This combination is a good rule of thumb for maintaining good health and reaping the benefits of both aerobic and resistance training.
Why It’s Good To Work Our Muscles
The muscle recovery process involves the regeneration of damaged muscle cells. This regeneration process is not limited to just muscles; it occurs in other tissues as well. By continually renewing cells, your body maintains its youthful vitality and functionality.
During exercise, especially intense or resistance-based workouts, you create tiny tears in your muscle fibers. These micro-tears are a natural response to the stress placed on your muscles during the workout.
In response to the muscle microtrauma, your body triggers an inflammatory response. While inflammation is often associated with negative connotations, it is a vital part of the healing process. It brings blood, nutrients, and immune cells to the damaged area, which helps remove debris and kick-start the repair process.
The muscle recovery process involves the regeneration of damaged muscle cells. This regeneration process is not limited to just muscles; it occurs in other tissues as well. By continually renewing cells, your body maintains its youthful vitality and functionality.
Fixate On The Desire To Be Stronger and More Active
Beyond the fixation on exercise for weight loss, let’s talk about something often overlooked: the impact on our long, healthy lives. To be stronger, more flexible and have more energy.
It’s not just about shedding pounds, but about embracing a future full of vitality. Among the clamor of cardio and calorie counting, there’s a hidden treasure: strength training. Muscles, often in the background, actually hold the key to how we age and live.
In a world where maintaining good health and quality of life is a priority for people of all ages, the importance of regular physical activity cannot be overstated. While aerobic exercise has long been touted for its cardiovascular benefits, another powerful player in the realm of health and longevity is resistance and strength training.
This dynamic duo not only helps older adults combat age-related muscle loss but also offers a plethora of benefits that contribute to a healthier, more vibrant life.
The good news is that resistance training is not complicated and it’s easier than you may think.
Resistance Bands-Amazon
Fabric Resistance Bands for Working Out – Booty Bands for Women and Men – Exercise Bands Resistance Bands
The Dual Impact: Aerobic Exercise and Resistance Training
When it comes to exercise, there’s no one-size-fits-all approach. Aerobic exercise, characterized by activities like brisk walking, cycling, and swimming, contributes significantly to heart health, weight loss, and overall fitness.
However, the missing piece for many individuals lies in resistance training. This type of exercise, focusing on muscle-strengthening activities, plays a vital role in enhancing muscle strength, lean muscle mass, and bone density.
Combating Age-Related Challenges:
As we age, the risk of chronic diseases, such as high blood pressure and cognitive decline, looms large. Regular exercise, particularly resistance and strength training, can be a powerful ally in minimizing these risks. Maintaining lean muscle mass through resistance exercises can help counteract age-related muscle loss, keeping the body strong and functional in the later years.
A Holistic Approach to Longevity:
Resistance and strength training go beyond the superficial goal of muscle definition; they are about building a foundation for a healthy life. From improving bone density to boosting the immune system, these exercises are a cornerstone of overall health. When coupled with aerobic workouts, they create a powerful synergy that supports the heart, mind, and body.
In the journey towards a healthy and fulfilling life, the importance of resistance and strength training cannot be overstated. Resistance training can’t make up for a bad diet but it will make your body strong and help you live longer.
These exercises are not just about the present; they are investments in a better future. By incorporating regular physical activity, especially muscle-strengthening activities, people of all ages can enjoy the many health benefits that come with a strong, resilient body. So, whether you’re lifting free weights or doing bodyweight exercises, remember that every rep is a step towards a healthier, happier you.
Lisa Marinkovich is a seasoned influencer and entrepreneur known for her vibrant personality and passion for inspiring women.
With a background in media and lifestyle content creation, Lisa has made a significant impact through her work as a lifestyle contributor for renowned publications like the Seattle Times, PNW Magazine, and Fox TV. She is the driving force behind Gal Pal, a platform dedicated to empowering women to live life with purpose, grace, and joy.
We use cookies to give you the best online experience possible. Cookies keep our site secure and reliable. Consenting will allow us to process data and browsing behavior. Not consenting, may adversely affect certain features and functions.
Functional
Always active
The technical storage or access is strictly necessary for the legitimate purpose of enabling the use of a specific service explicitly requested by the subscriber or user, or for the sole purpose of carrying out the transmission of a communication over an electronic communications network.
Preferences
The technical storage or access is necessary for the legitimate purpose of storing preferences that are not requested by the subscriber or user.
Statistics
The technical storage or access that is used exclusively for statistical purposes.The technical storage or access that is used exclusively for anonymous statistical purposes. Without a subpoena, voluntary compliance on the part of your Internet Service Provider, or additional records from a third party, information stored or retrieved for this purpose alone cannot usually be used to identify you.
Marketing
The technical storage or access is required to create user profiles to send advertising, or to track the user on a website or across several websites for similar marketing purposes.